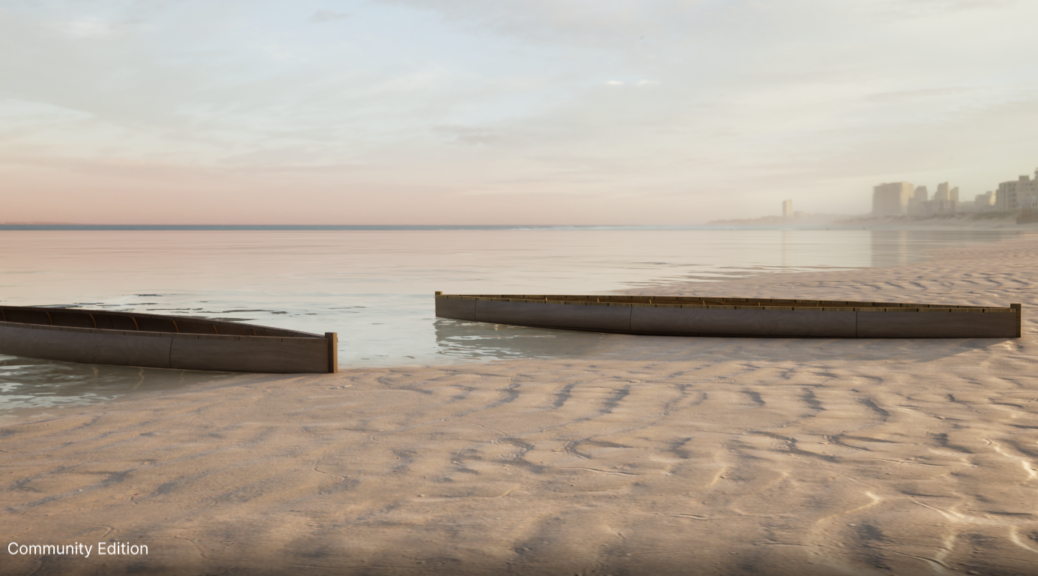
Grasshopper Creating a small boat
This workflow begins by defining the boat’s hull geometry through NURBS curves using Grasshopper’s Interpolate Curve or Control Points components, allowing parametric adjustment of shape via sliders. Next, a series of these curves are lofted with the Loft component to generate a smooth, continuous surface. Symmetry is enforced using the Mirror component along the longitudinal axis, ensuring bilateral consistency, while Merge unifies the halves into a cohesive Brep. Parametric sliders dynamically adjust key variables.
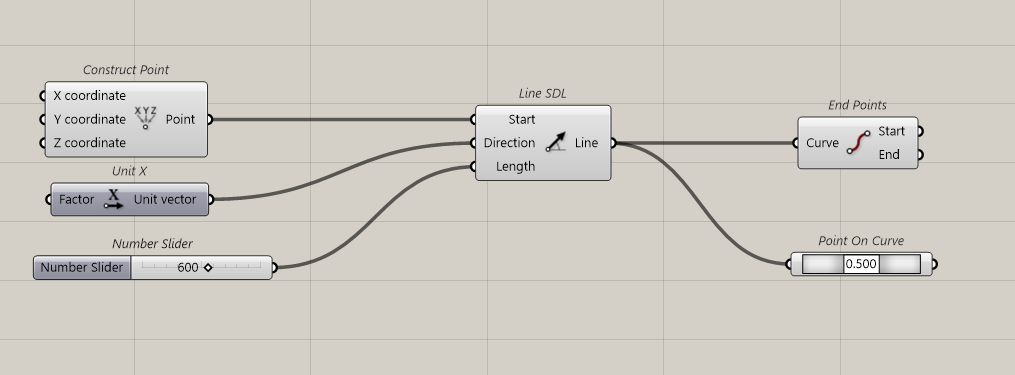
Fist start with a Point !
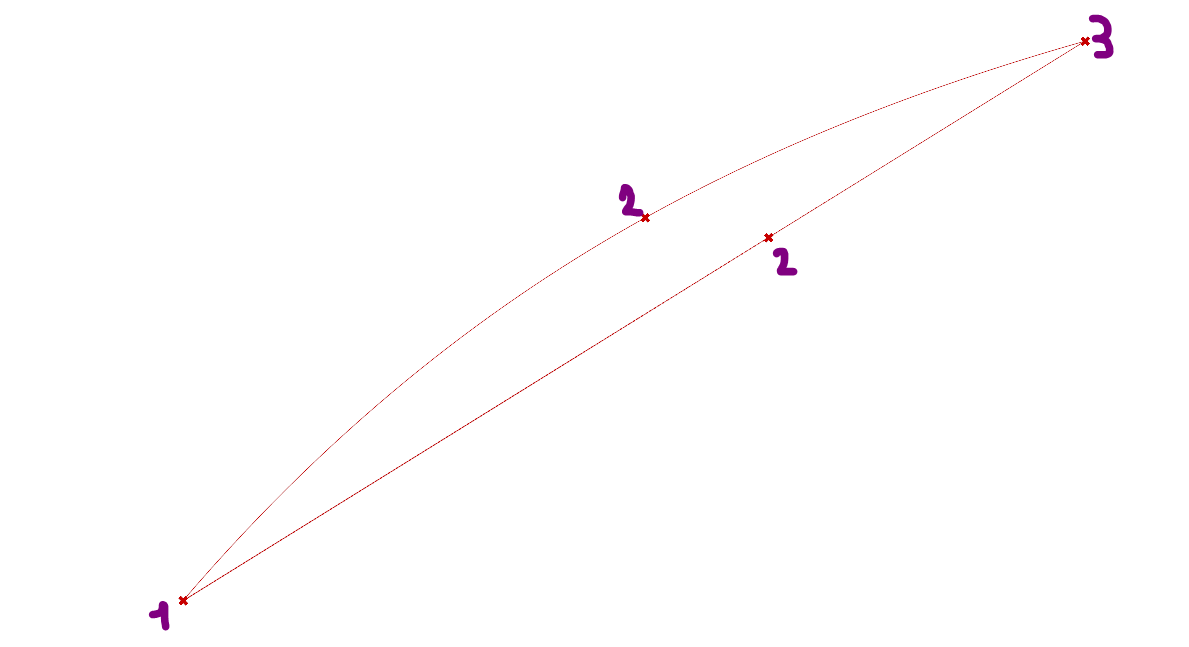
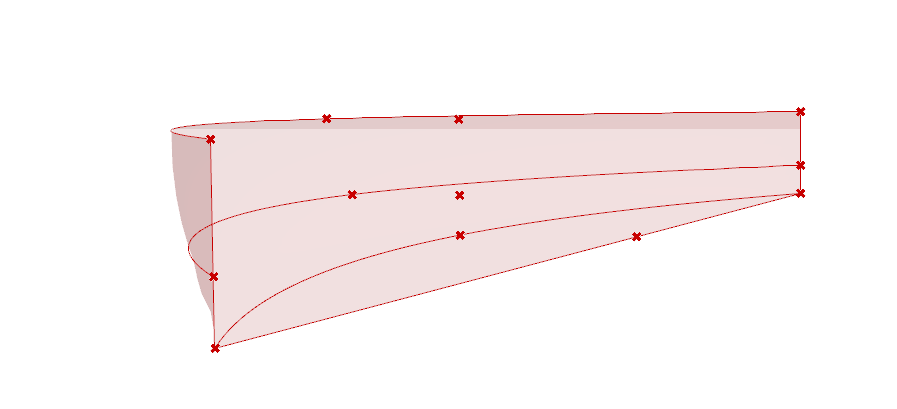
1. Creating the Base Curve
- Starting Point: Begin with a reference point (e.g., the origin or keel endpoint).
- 3-Point Curve: Use a NURBS curve with three control points:
- Start/End Points: Define the boat’s length (e.g., bow to stern).
- Middle Point: Adjusts the hull’s curvature (beam/width). Use a Move component to tweak this point vertically or horizontally.
- Grasshopper Tools: Control Points or Interpolate Curve components.
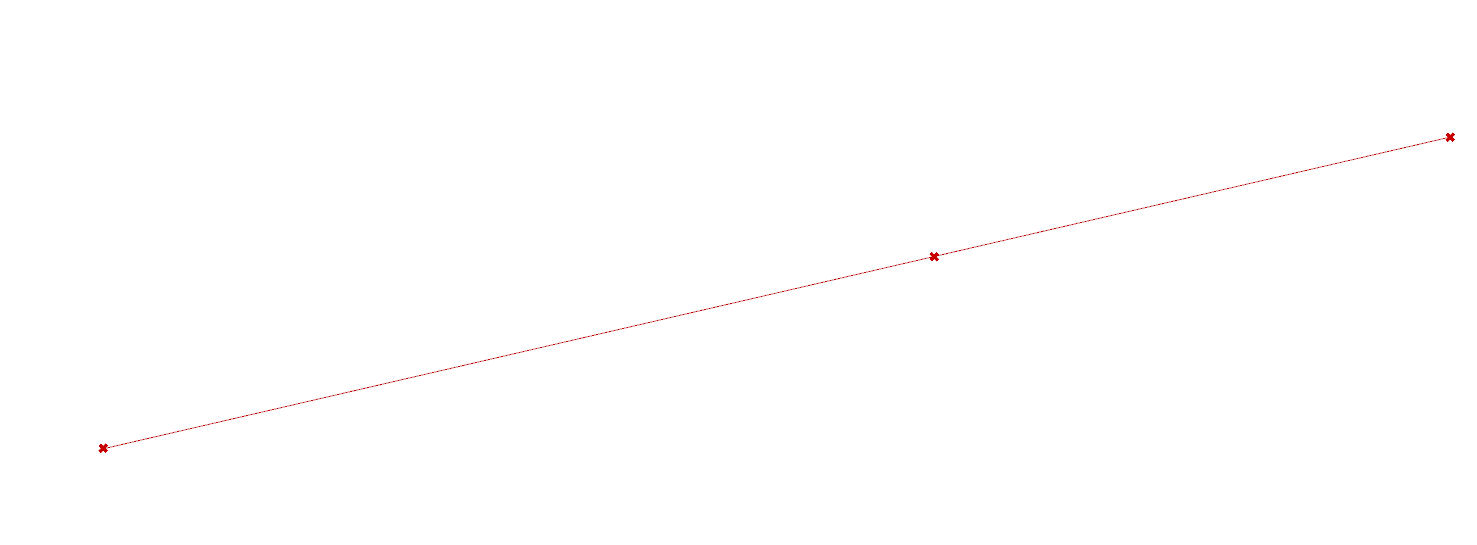
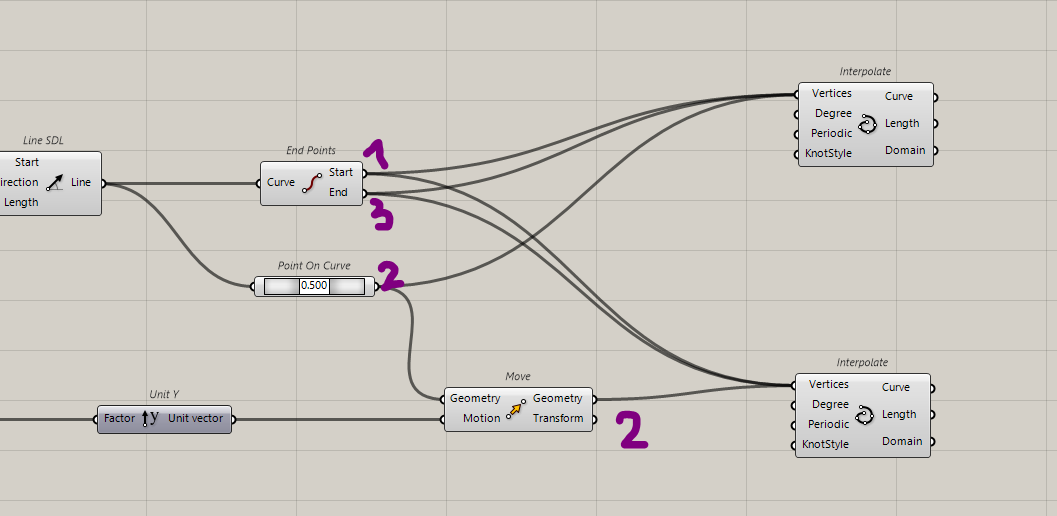
Moving the middle point
Creating the nurbs, respect of the order is crussial: 1/ first point, 2/ middle point, 3/last point.
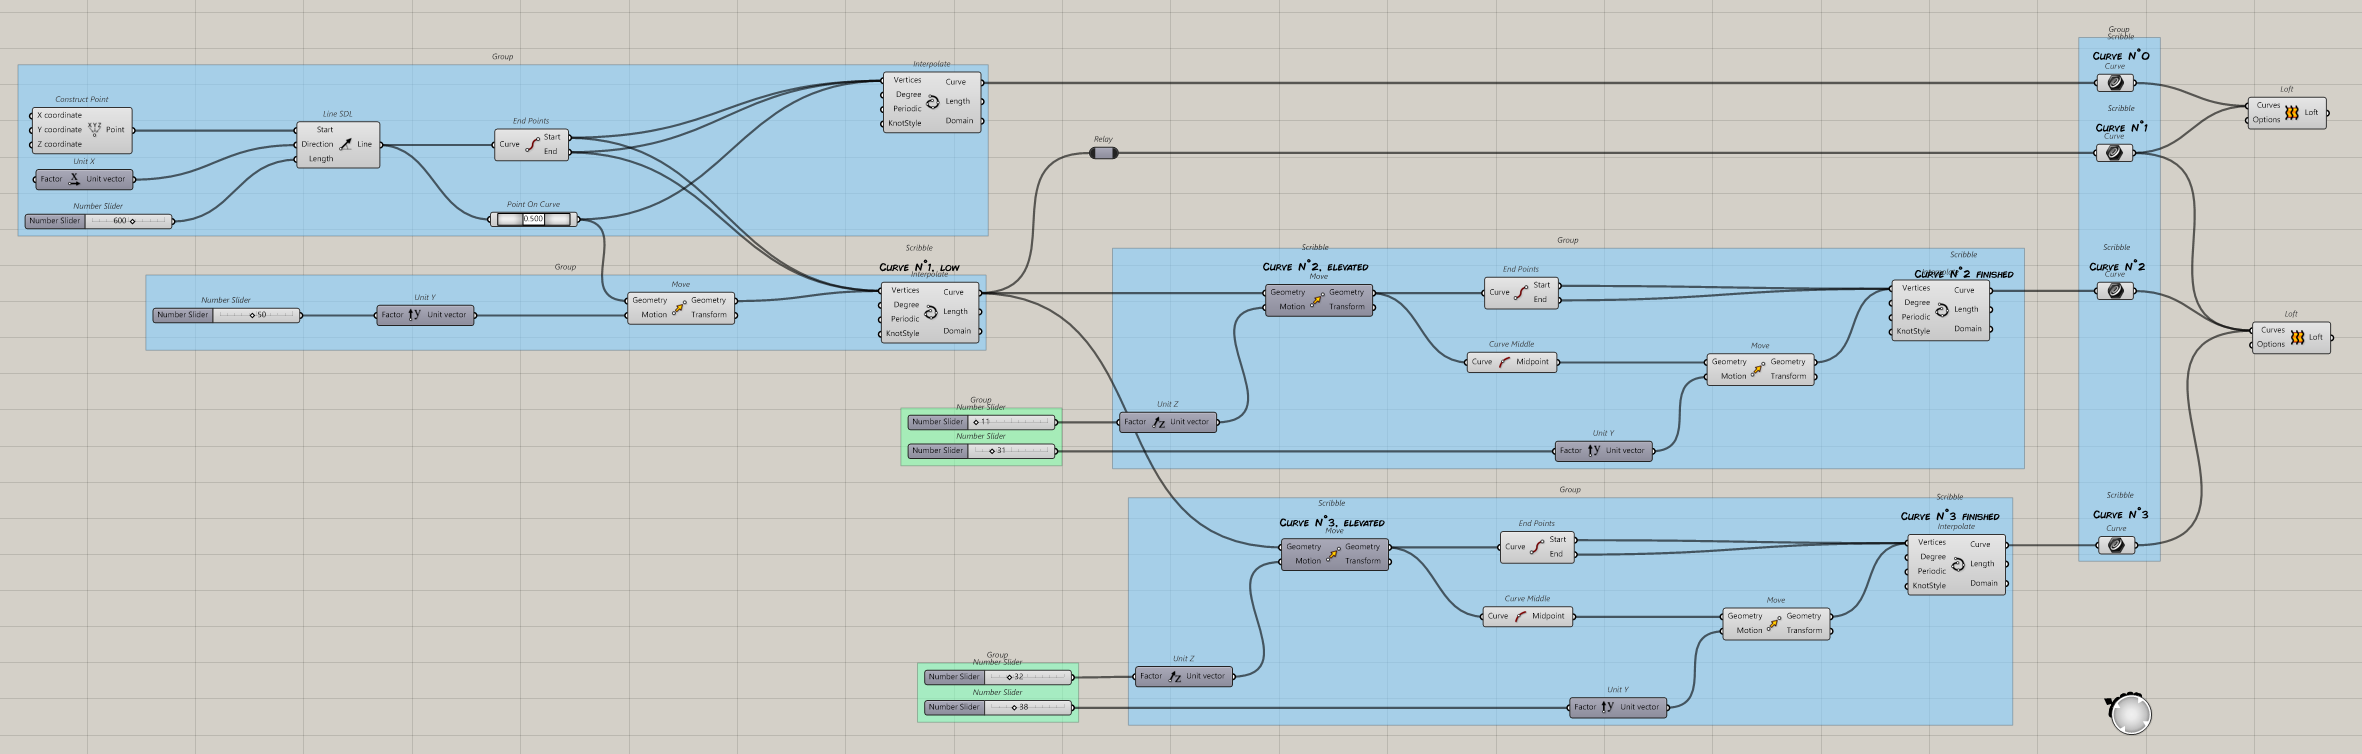
2. Duplicating Curves for Hull Sections
- Copy Along Axis: Duplicate the base curve along the boat’s longitudinal axis (e.g., using Move with a vertical/z-axis vector) to create parallel sections (e.g., keel, deck, gunwale).
- Adjust Shape: Scale or shift middle points of duplicated curves to refine the hull’s profile.
- Grasshopper Tools: Move, Scale, or Copy Along Vector.

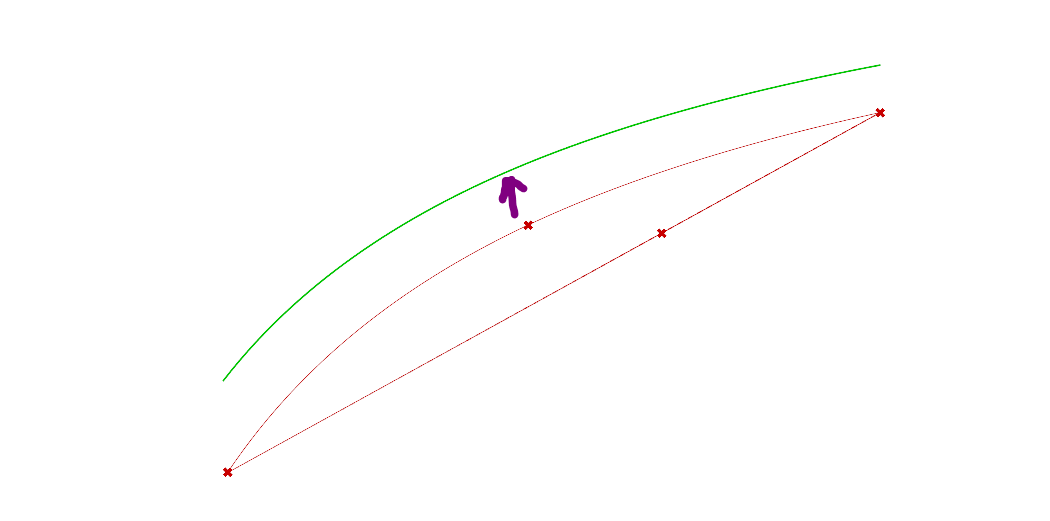
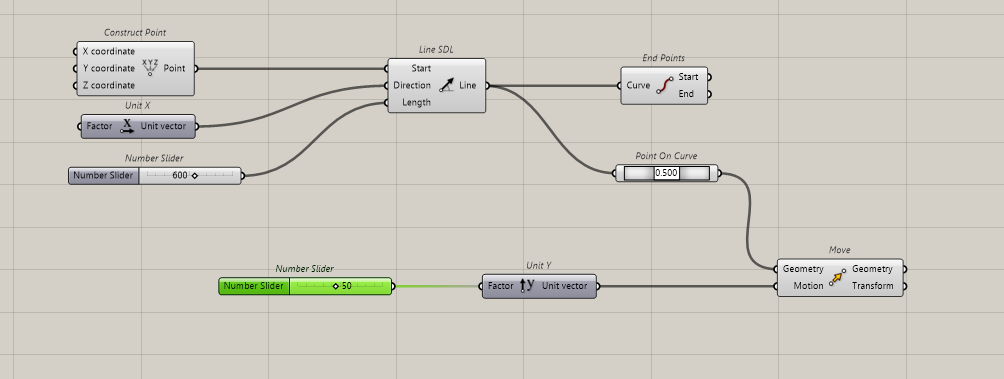
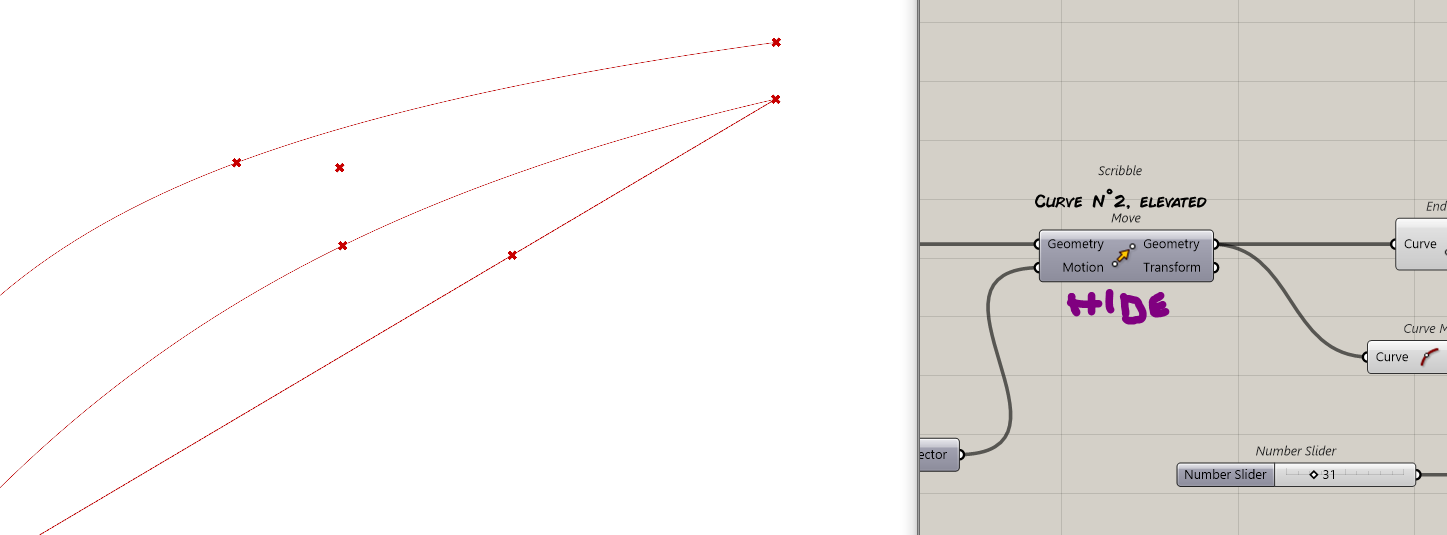
Then we need to identify th emiddle point to be abble to transform the shape of the hull. This is done as we did before.
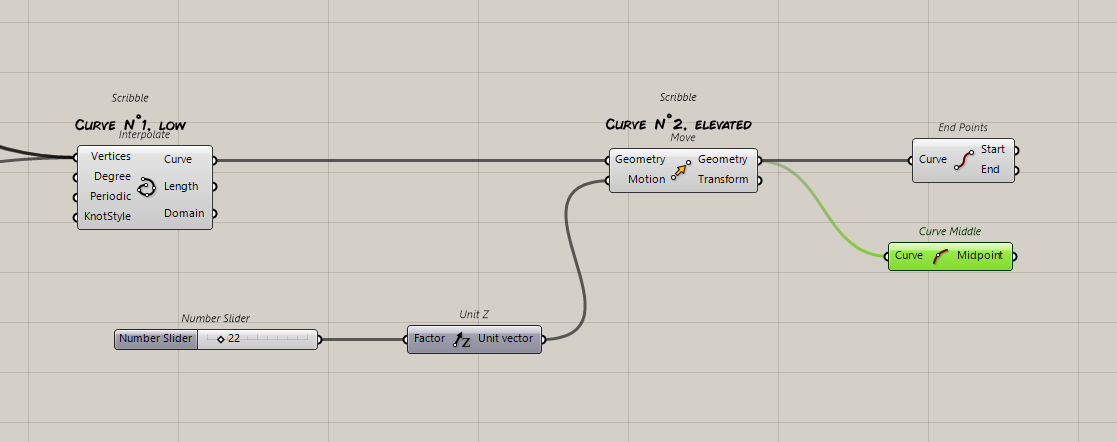
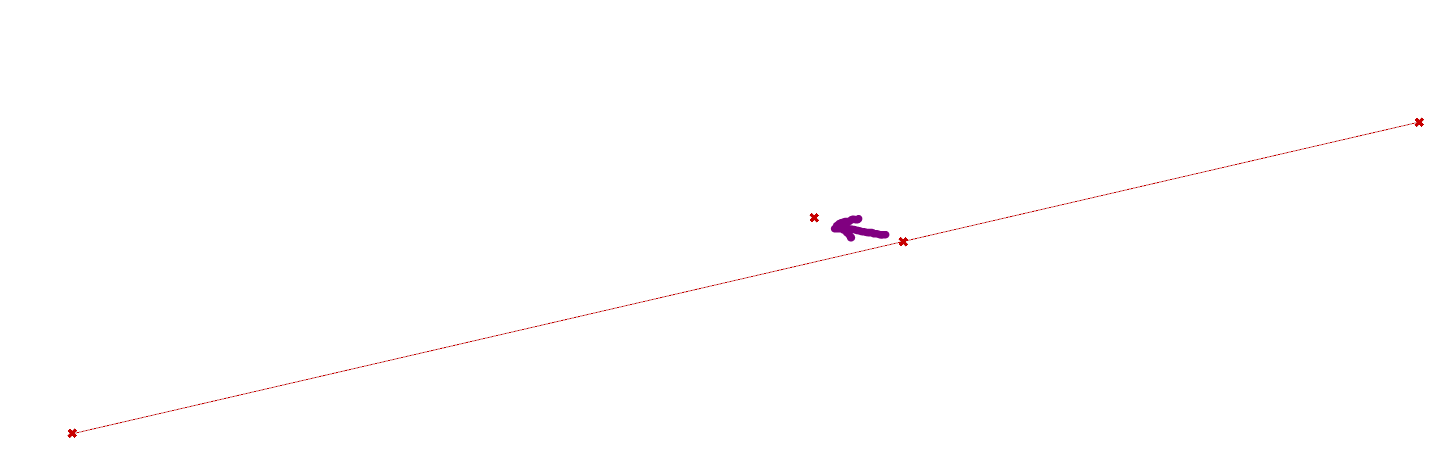
We move the midpoint in Y
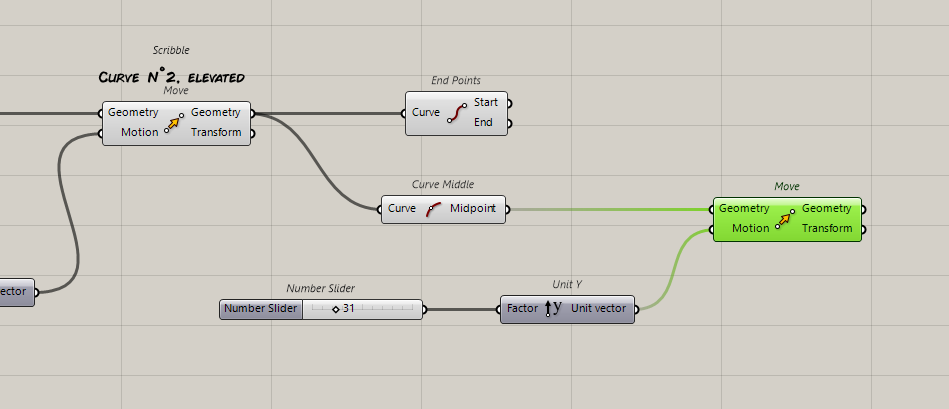
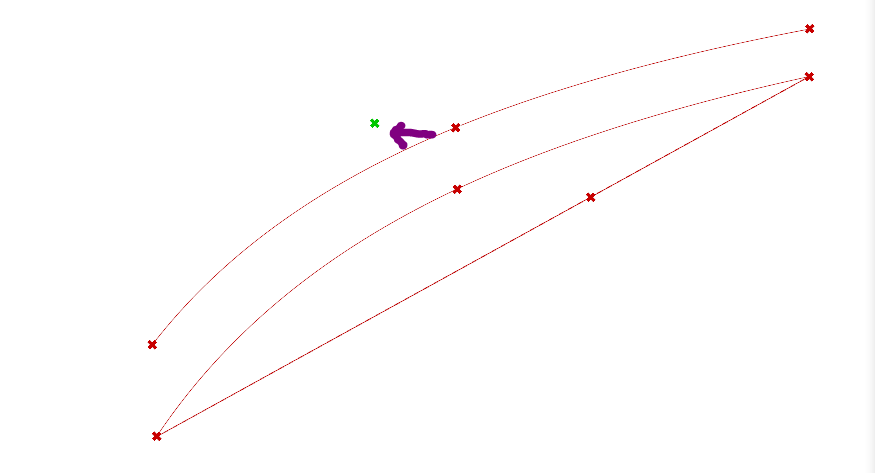
And we recreate a curve with the original end points and the new one.
We mask the curve n°2 which does not need to be visible.
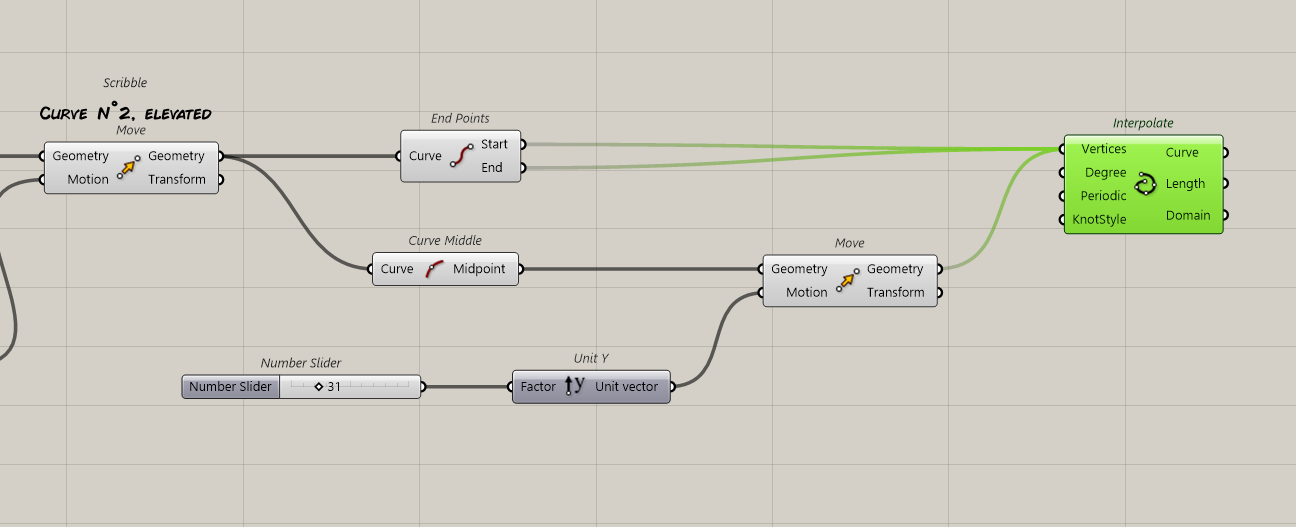
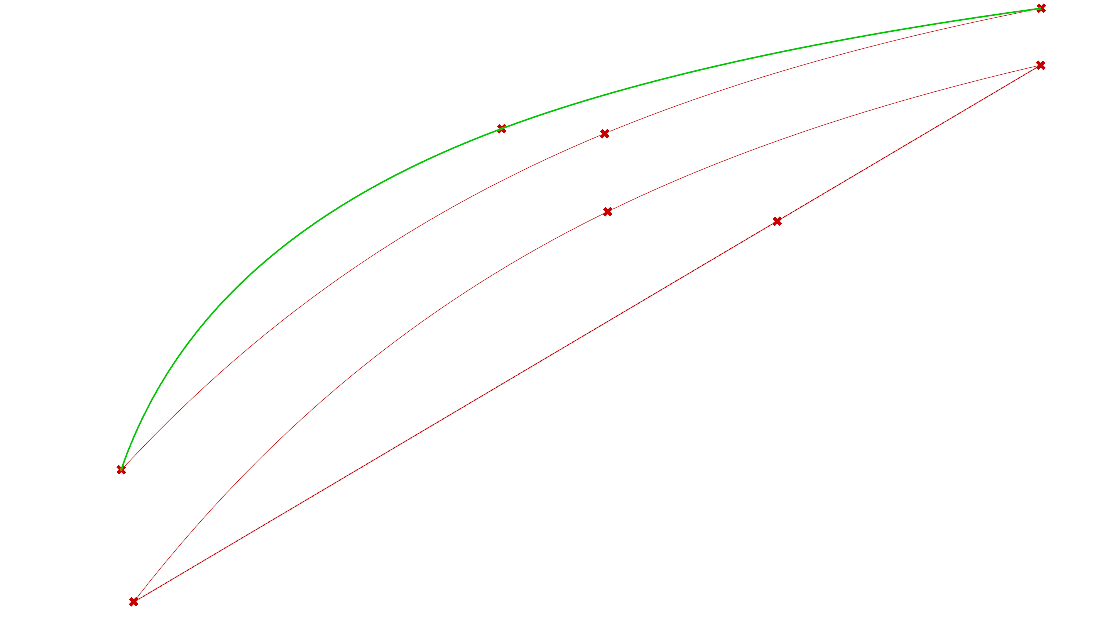
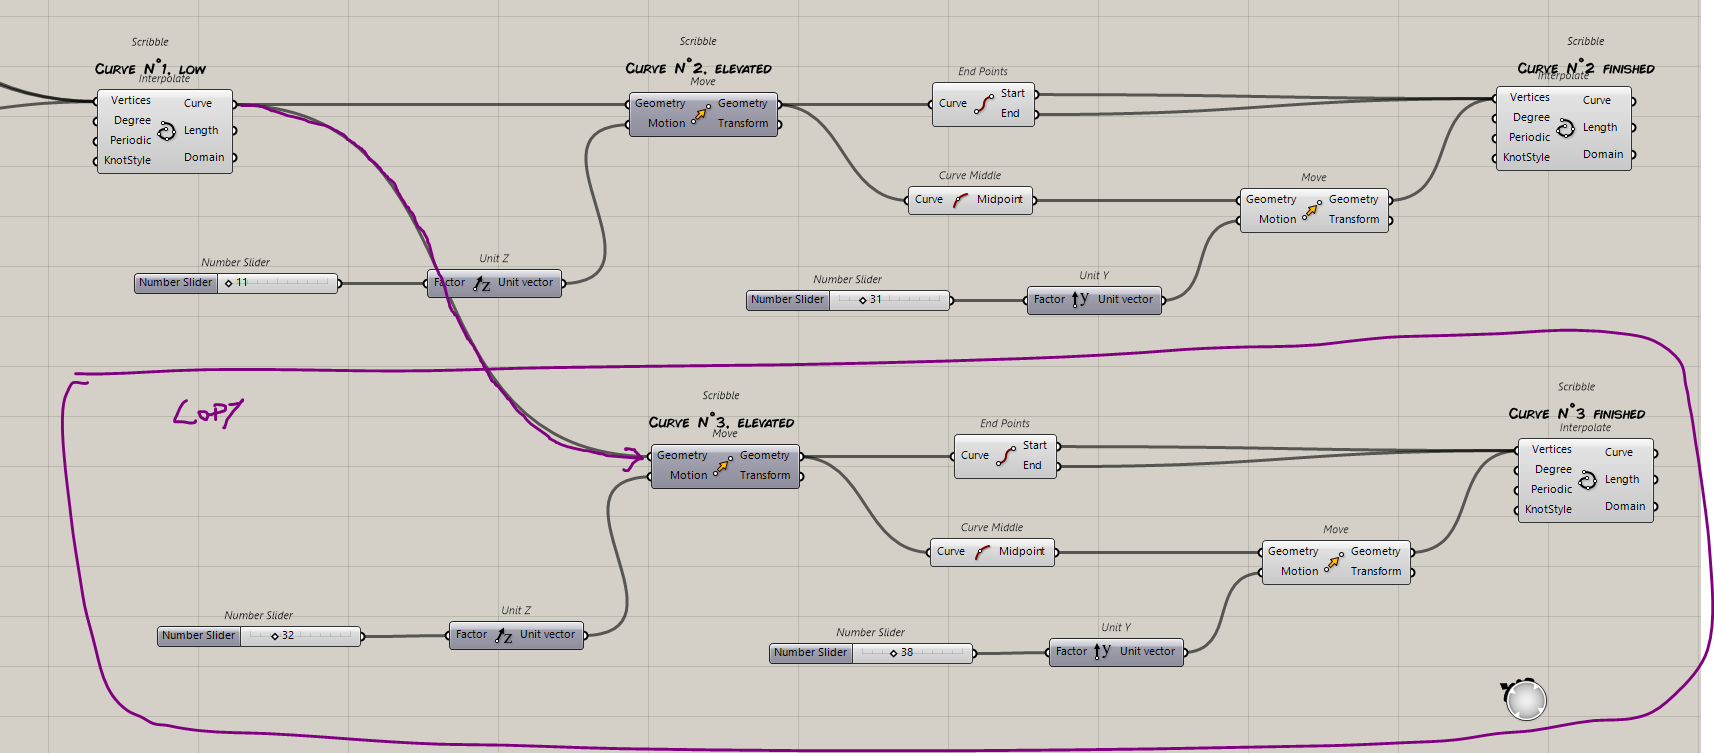
Copy past the components to create a third curbe the same way
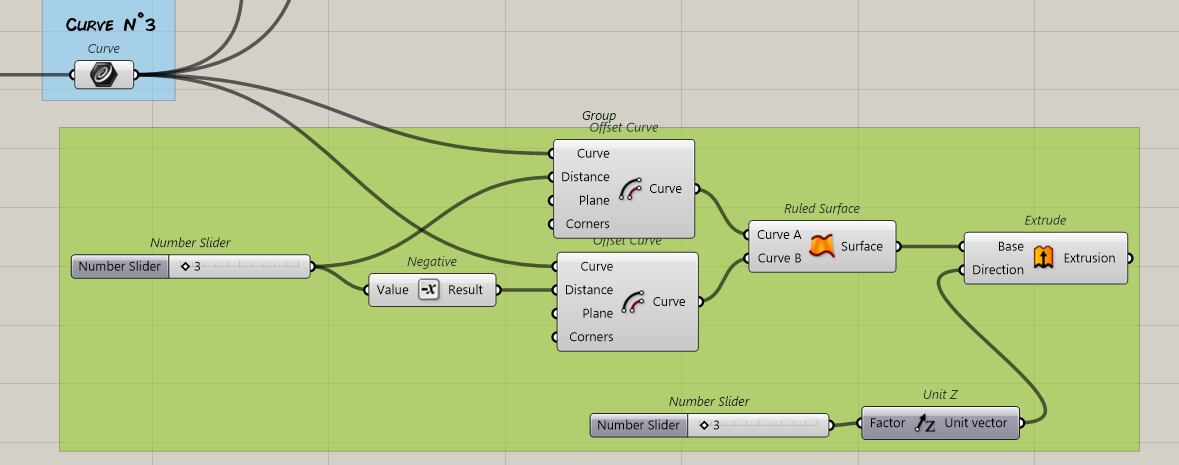
3. Lofting the Hull Surface
- Surface Generation: Use the Loft component to connect all curves into a smooth hull.
- Continuity Check: Ensure curves are ordered and aligned to avoid twisting. Adjust control points if needed.
- Grasshopper Tools: Loft, Sort Curves, Evaluate Continuity.
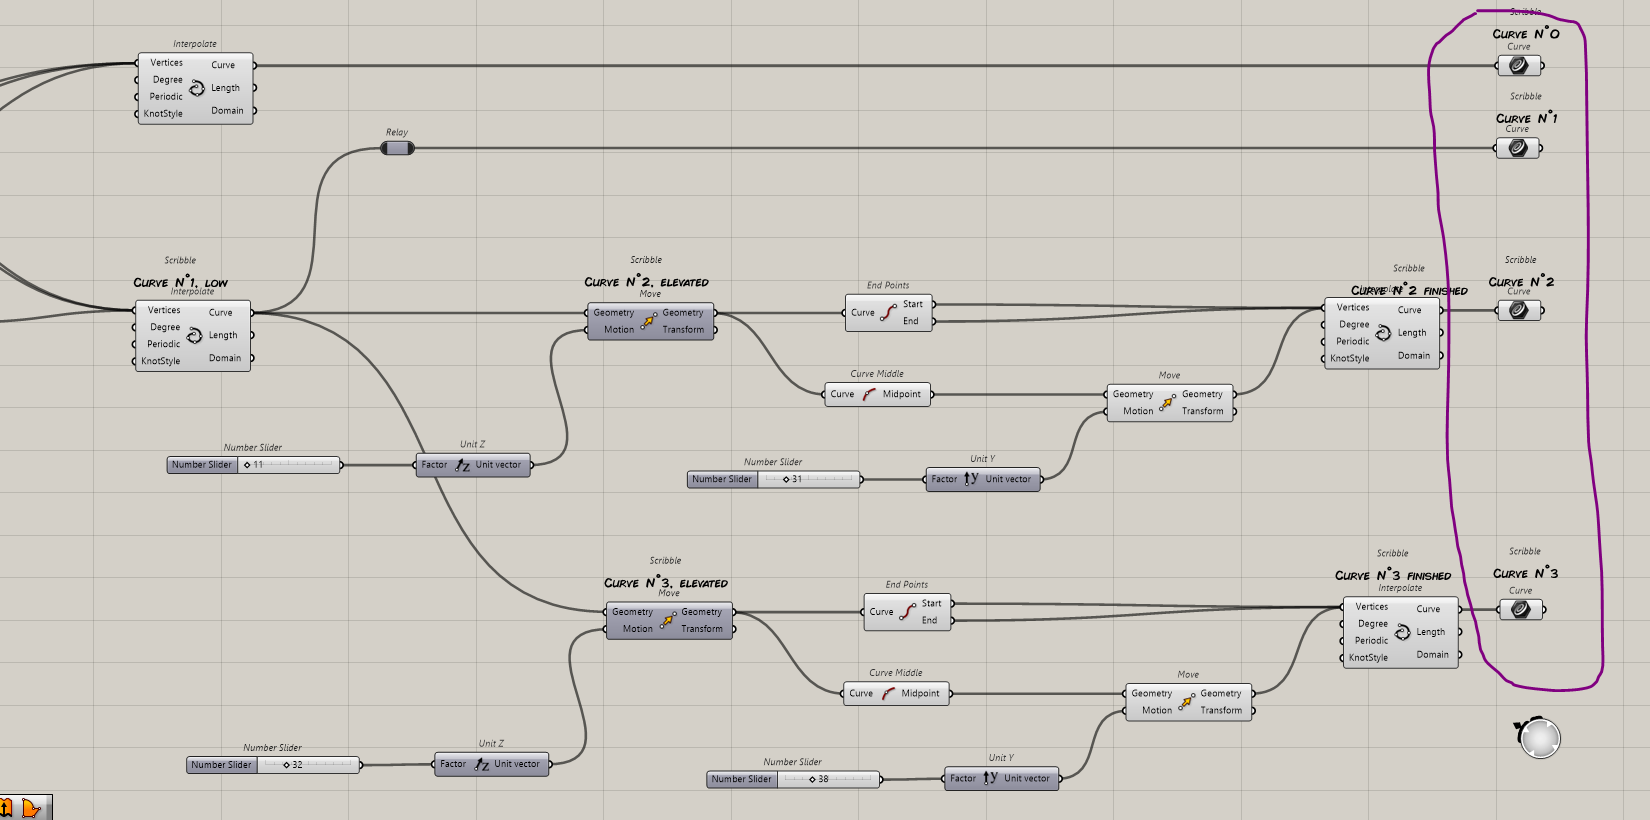
To be more clear, we connect a Generic Curve to all our curves to better identifies them
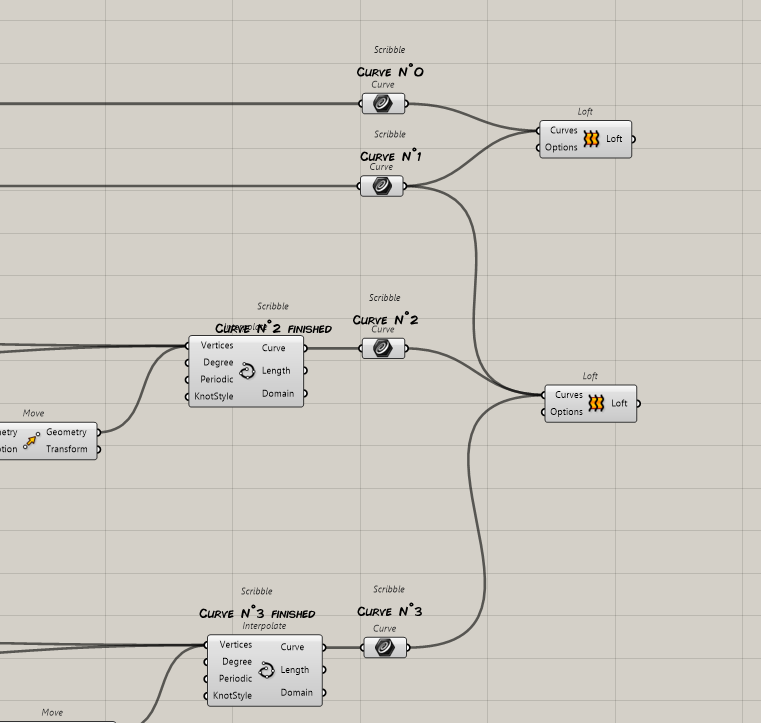
The we loft Curves 0 and 1 and then Curves 1,2 and 3.
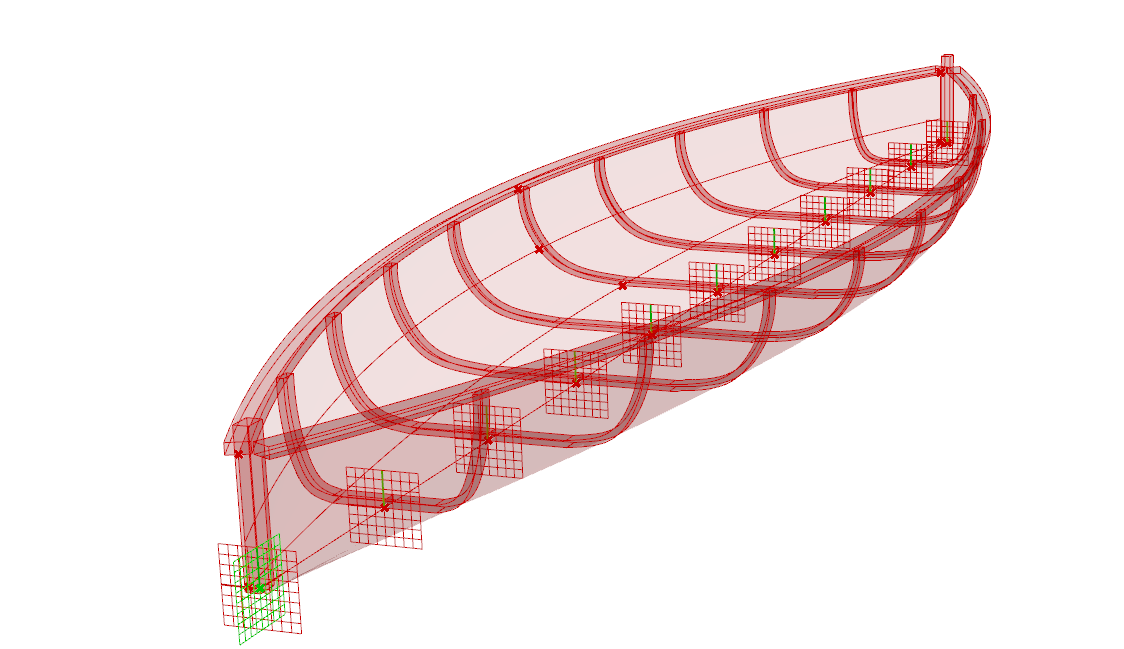
Reorganisation and overview before the next step
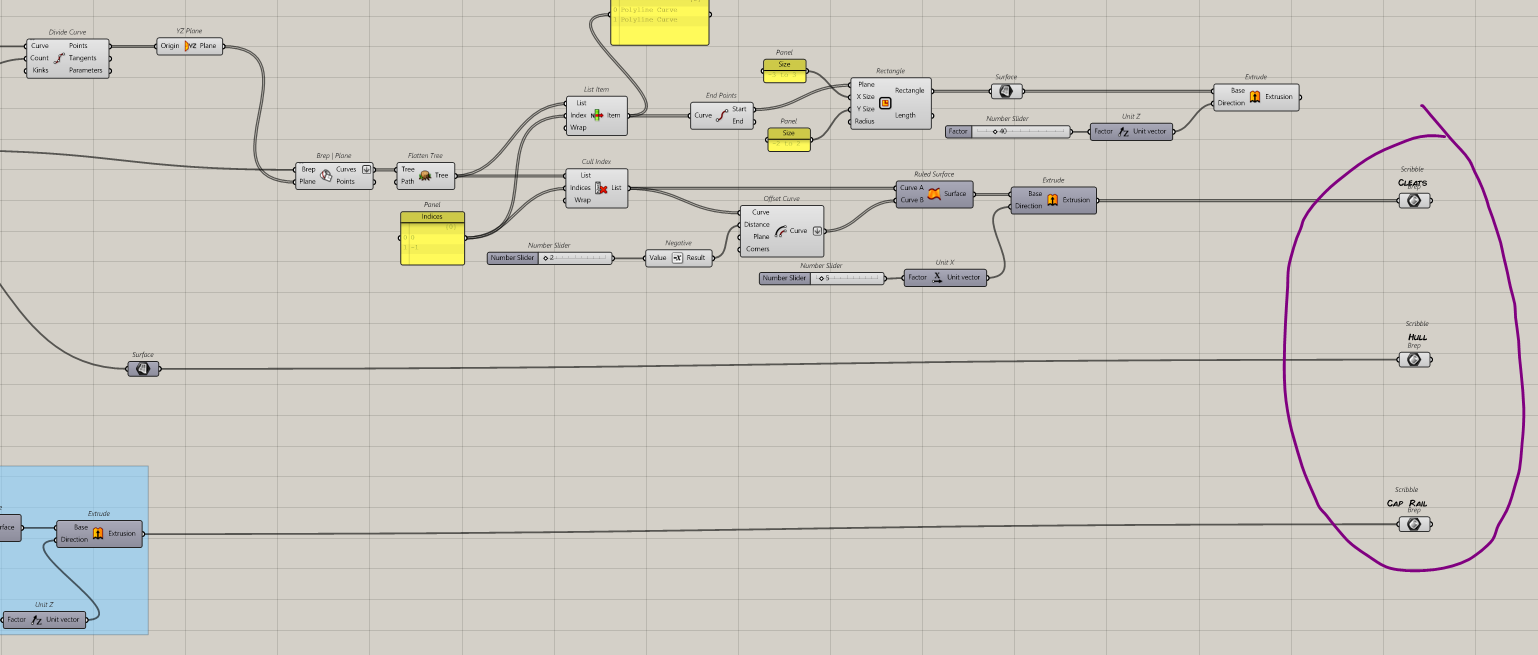
4. Creating Side Cleats
- Define Planes: Create planes at specific angles/positions using Construct Plane (e.g., perpendicular to the hull’s sides).
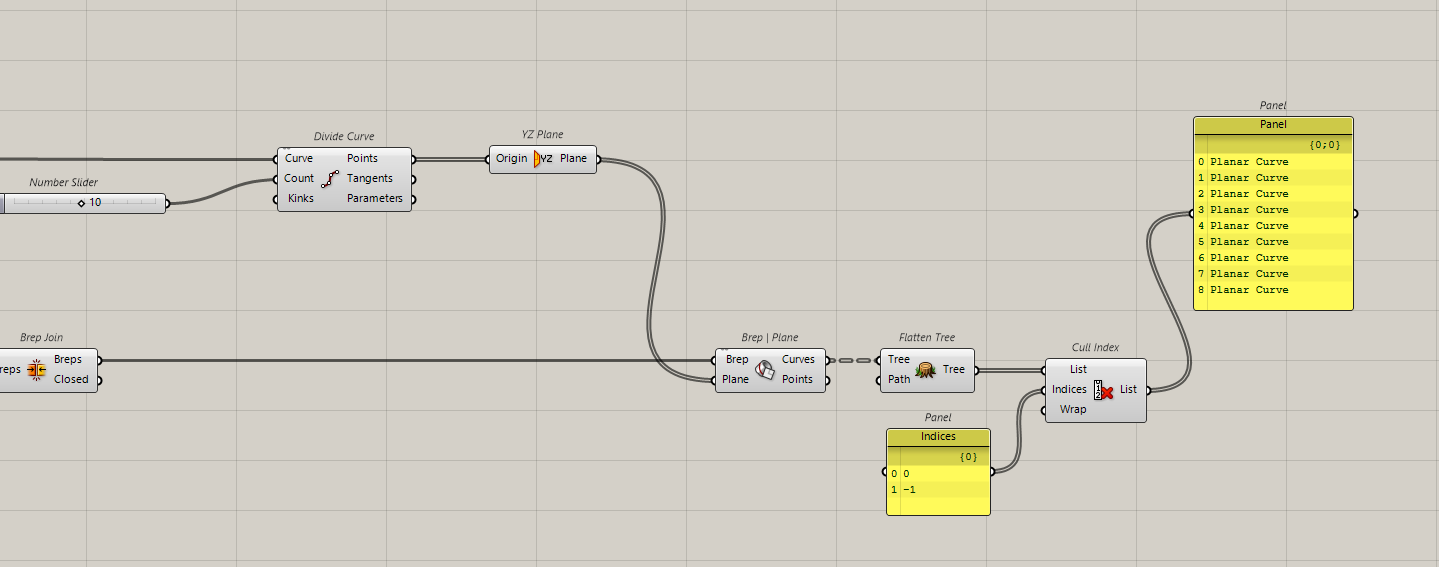
- Intersect with Stem Line: Use Curve | Plane Intersection to generate points where planes cut the stem (front curve of the hull).
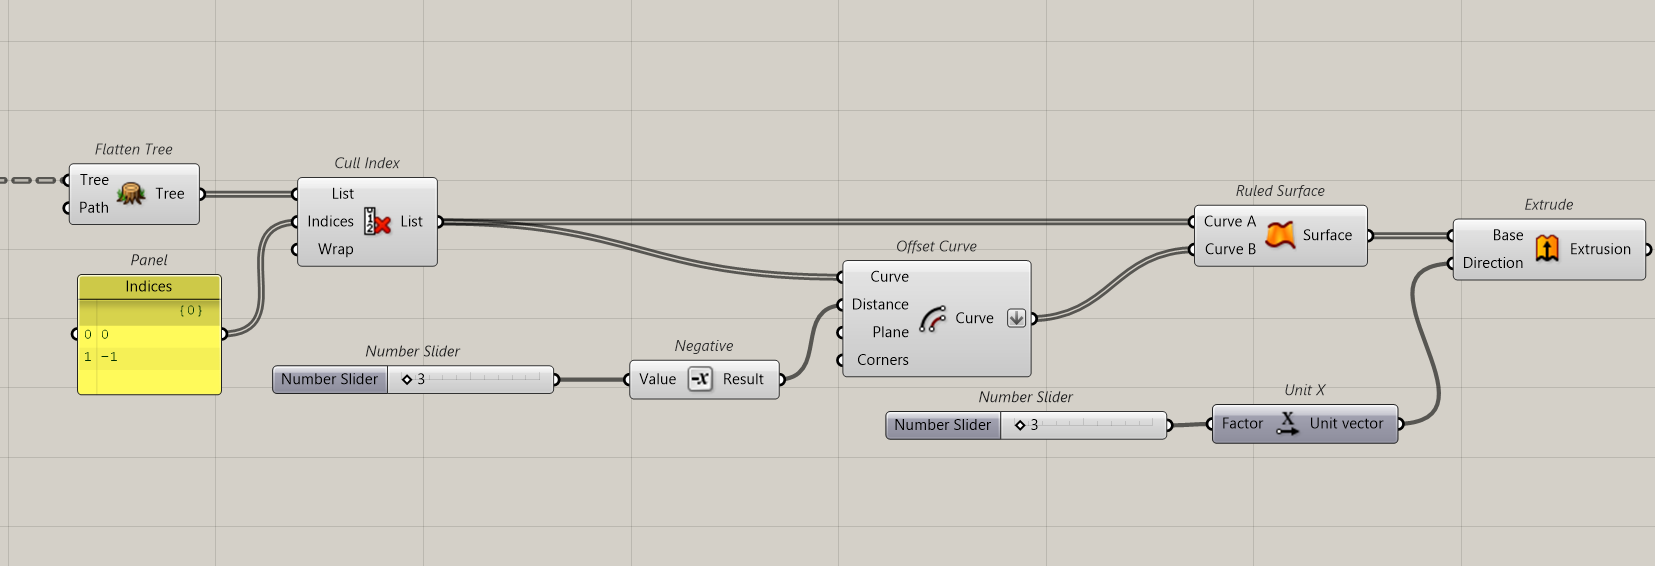
- Extrude or Sweep: Convert intersection points/curves into 3D cleats using Extrude or Sweep.
- Grasshopper Tools: Plane, Intersect, Pipe or Extrude.
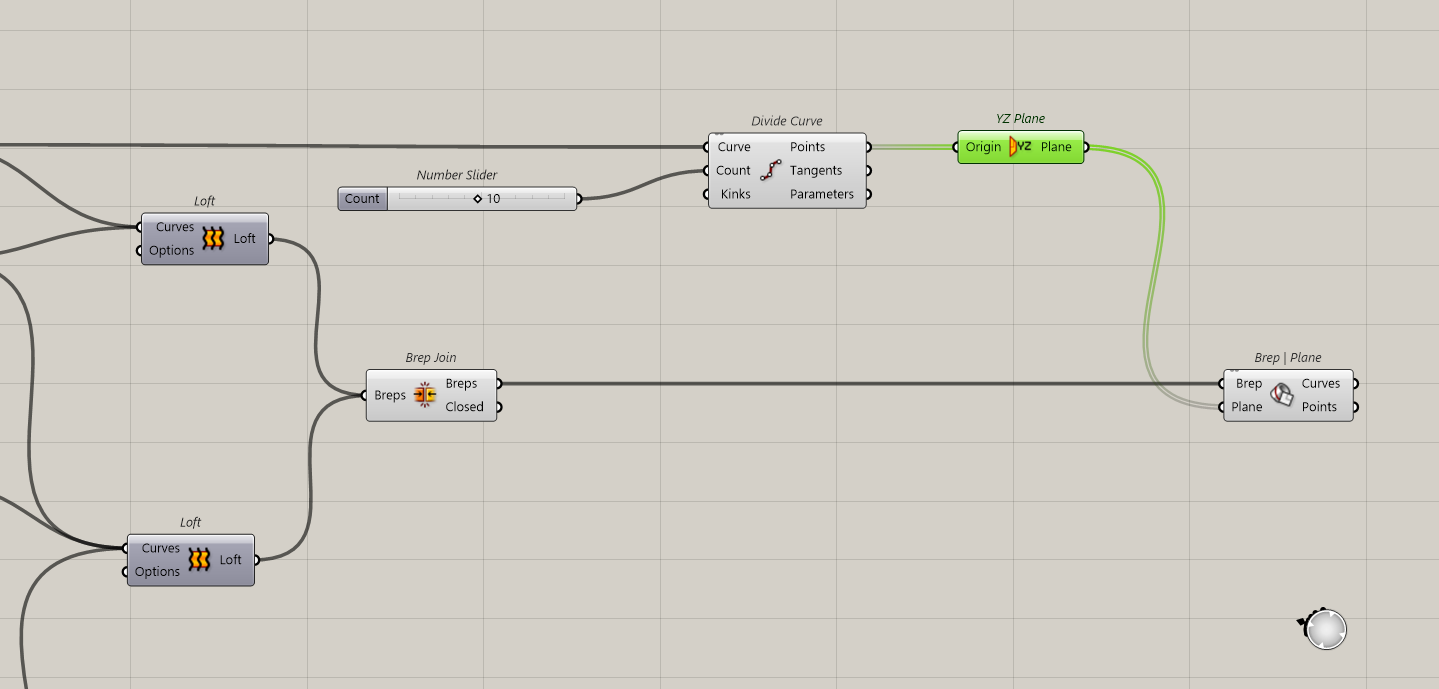
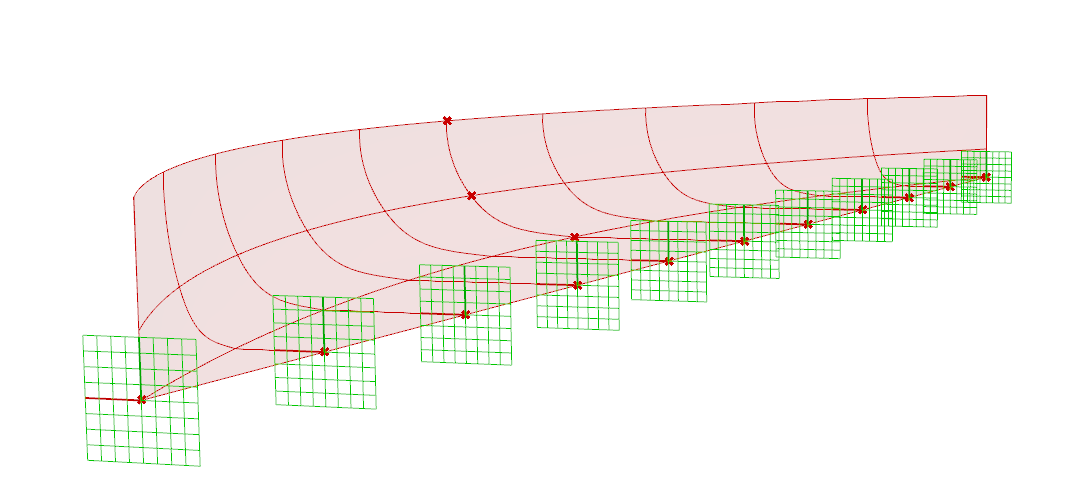
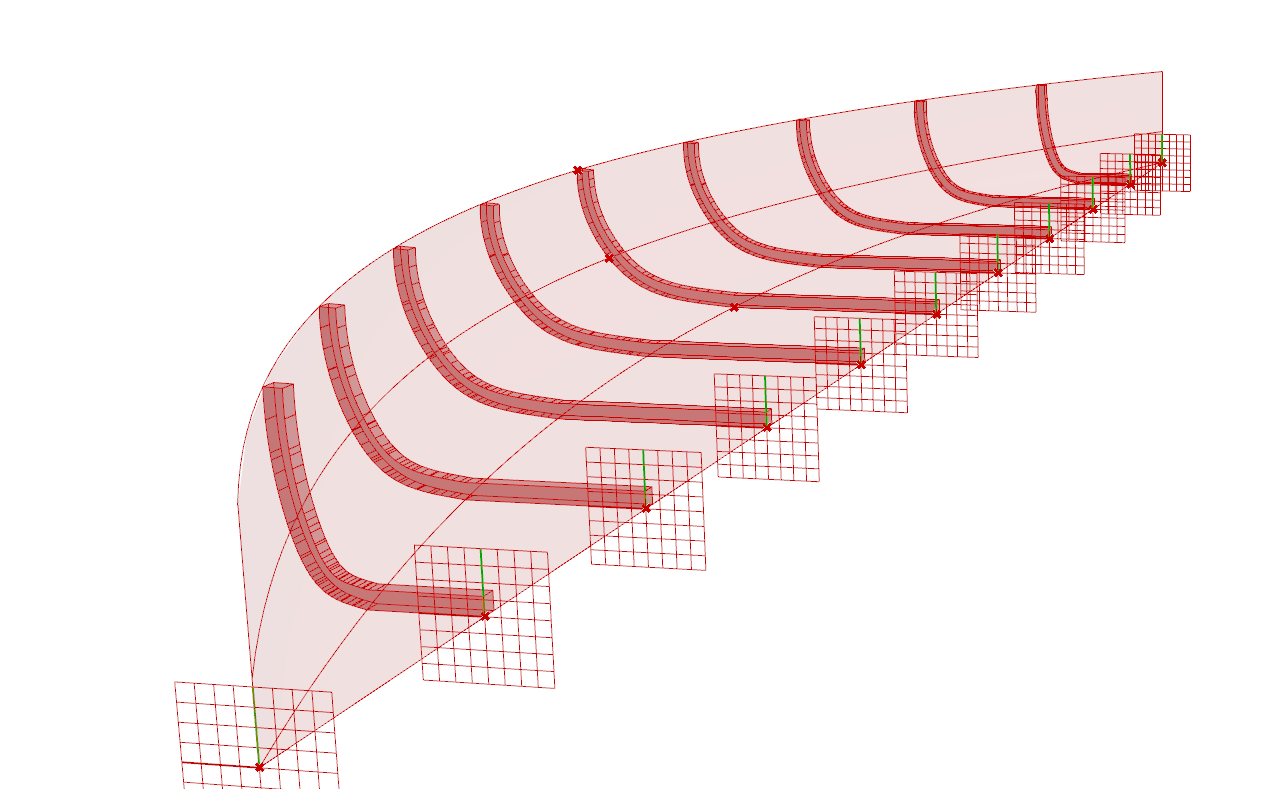
Creating the 3D cleats
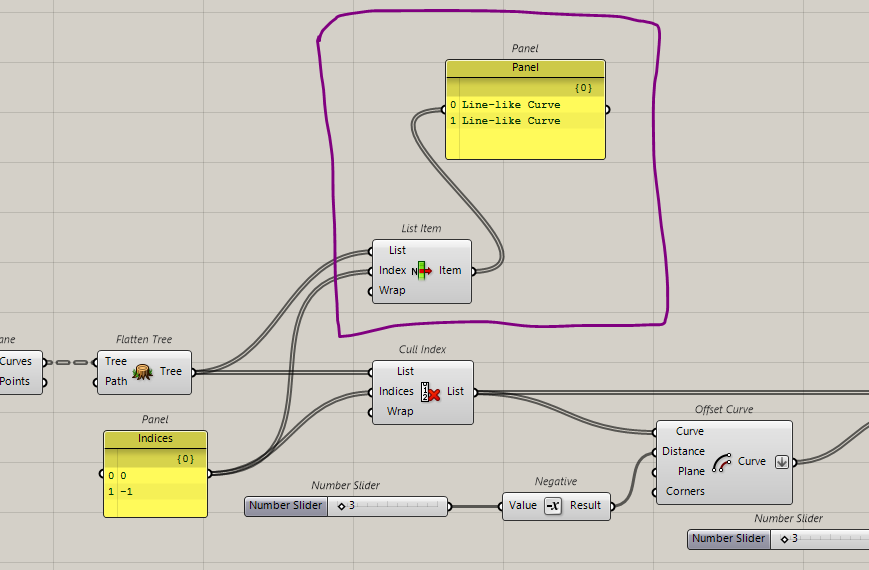
We remove the first and last lines that will be created separately, by using Cull Index. 0 is the first Item and -1 is the last.
- Add a Panel:
- Drag a Panel component onto the Grasshopper canvas.
- Enable Multiline Data:
- Right-click the Panel.
- In the menu, check Multiline Data (this allows line breaks).
- Input Multiline Data:
- Double-click the Panel to edit.
- Type your data, and press Shift + Enter to create a new line.
(Regular Enter closes the input box.)
Isolating the stems
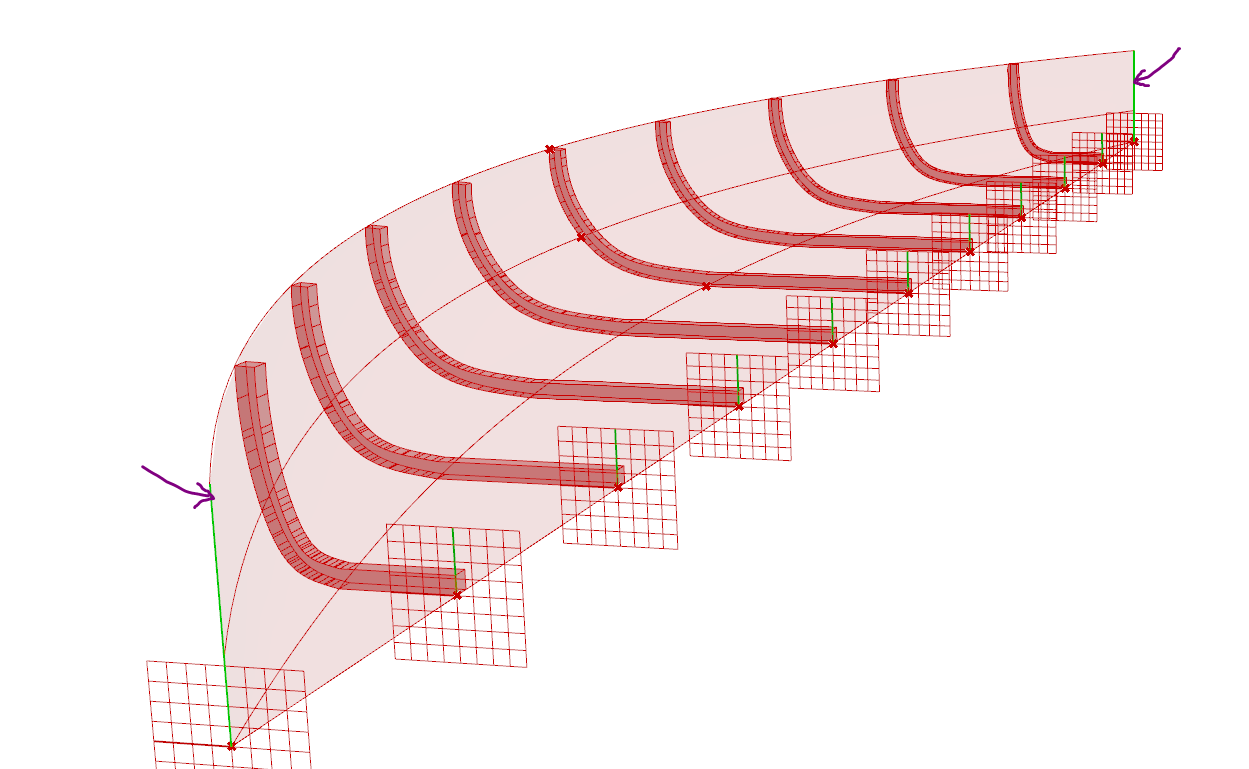
We easily create a rectangle
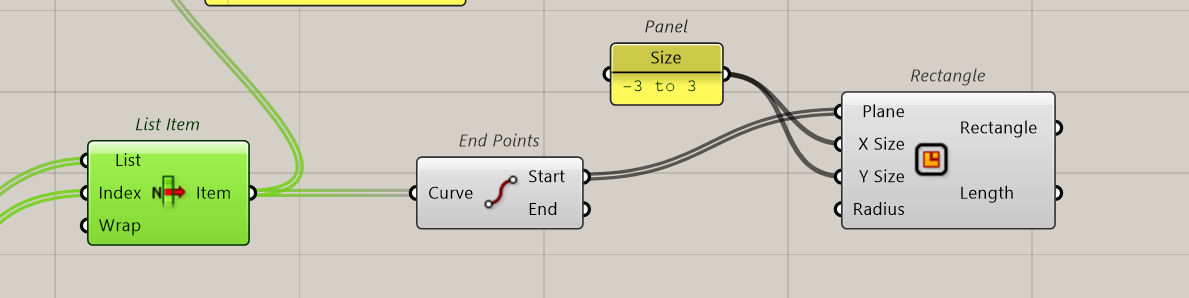
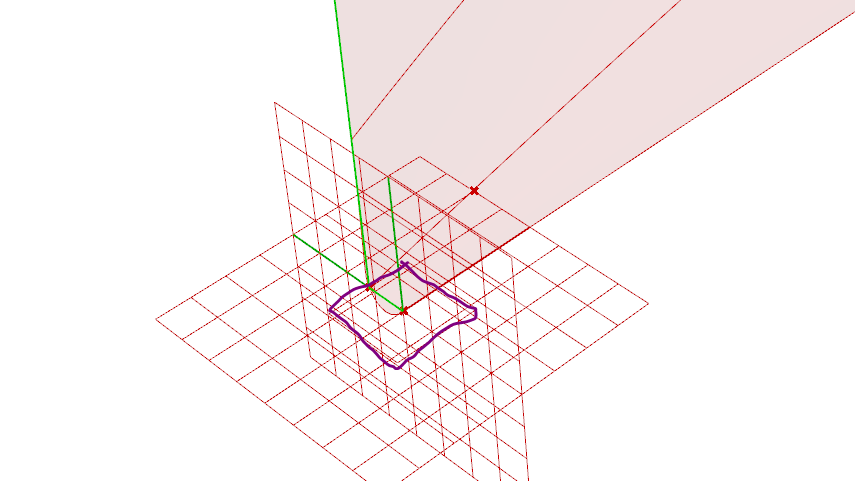
Then transform to surface and extrude
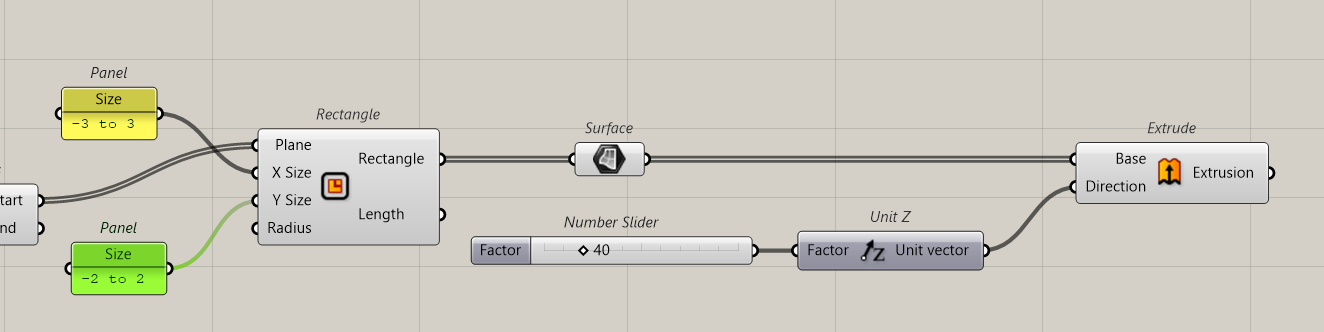
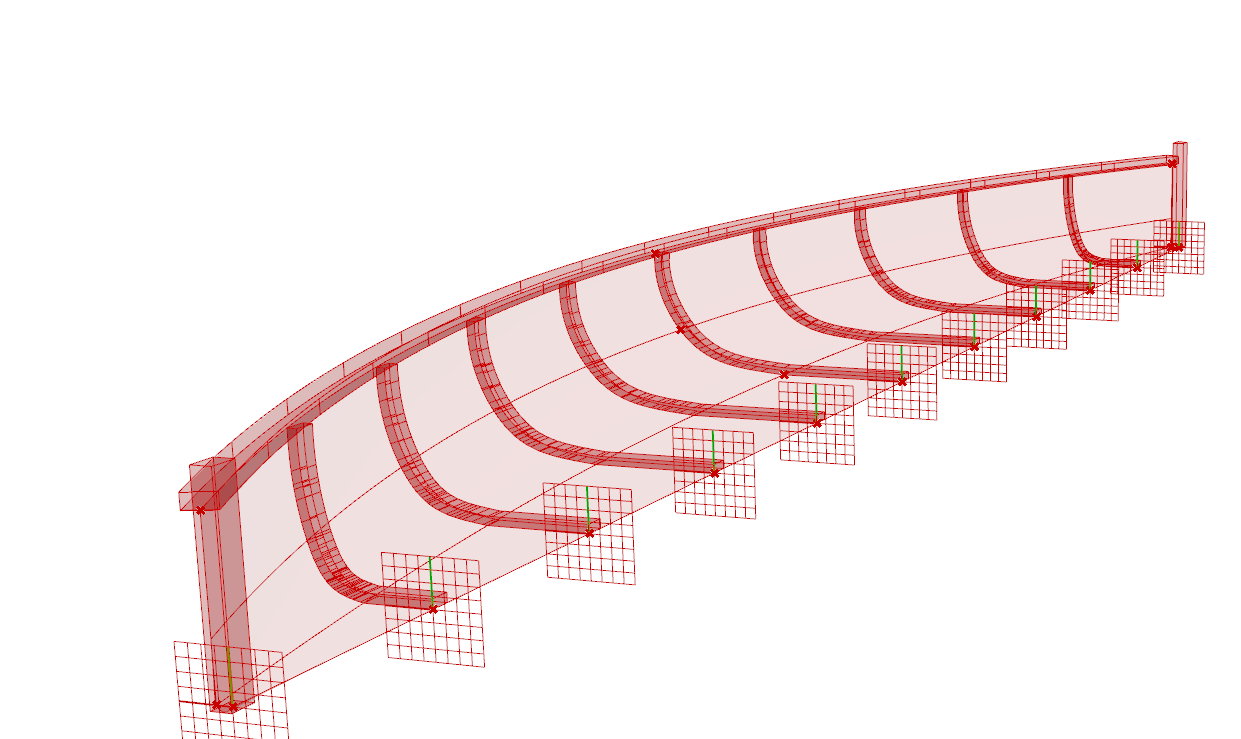
The Cap rail
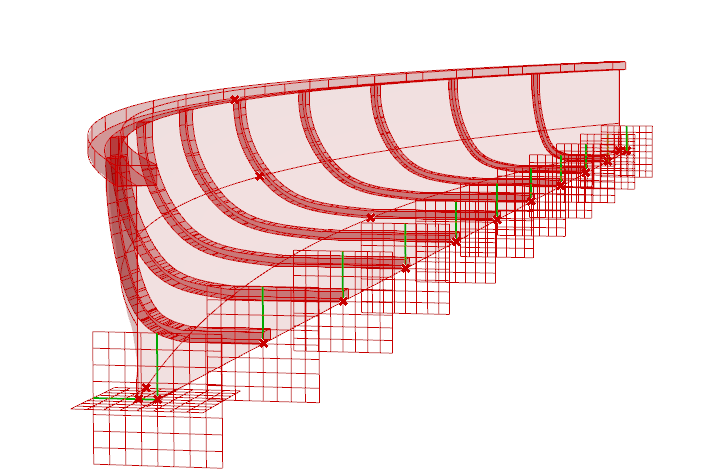
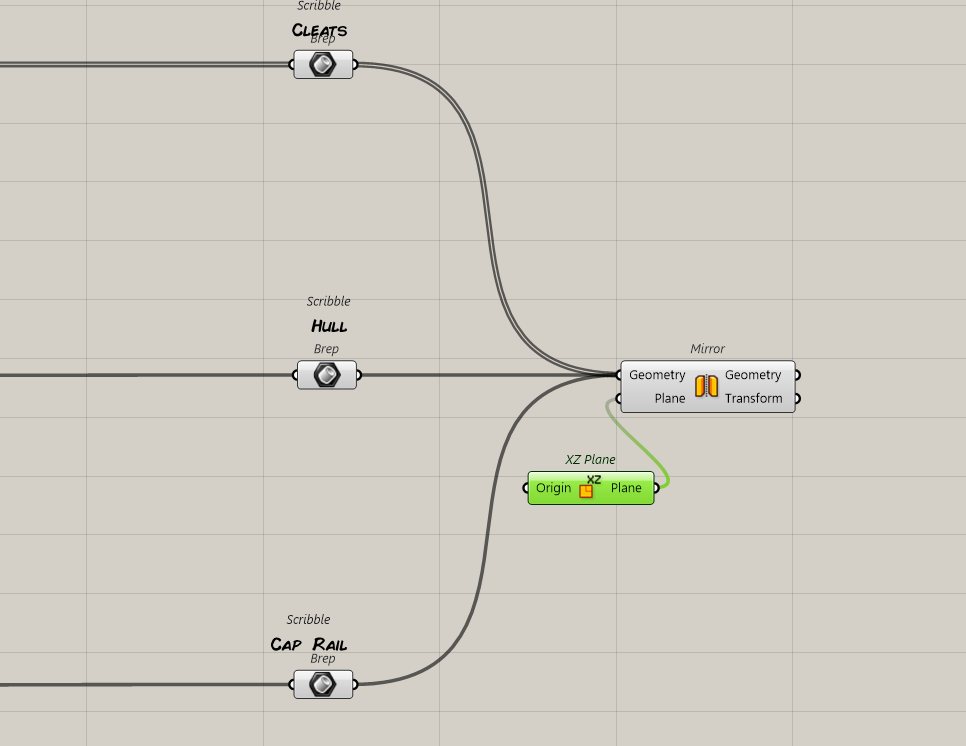
5. Symetry
For a clearer workspace, All geometries are put into a Brep container is placed at the end of the definition
Miror component
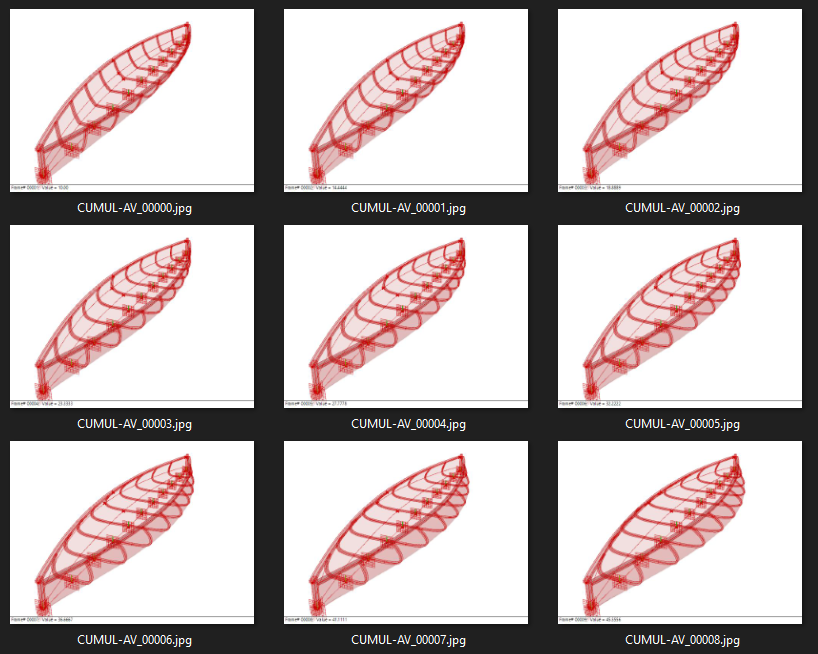
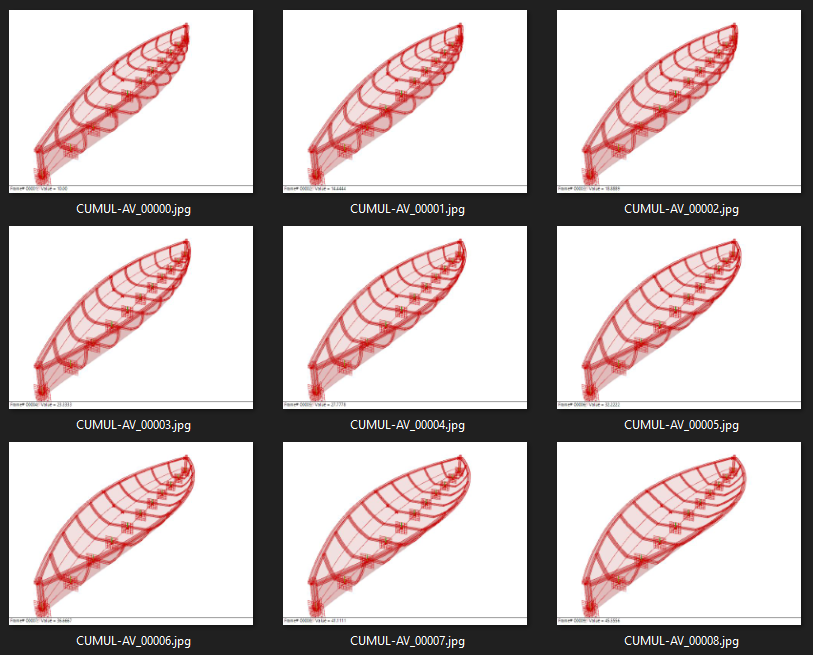
6. Variations